Guides › Print a sewing pattern to scale
How to Print a Sewing Pattern to Scale at Home
PDF sewing, quilting, and cosplay patterns only work if they print at exactly the right size. Here's how to calibrate against the test square and tile a pattern across regular pages with no copy-shop trip.
The test square is everything
Most pattern PDFs include a small calibration square (often labelled "1 inch" or "5 cm"). If that square measures correctly after printing, every pattern piece is correct too. Maker Mosaic lets you set scale directly from that square, so you're never guessing at printer settings.
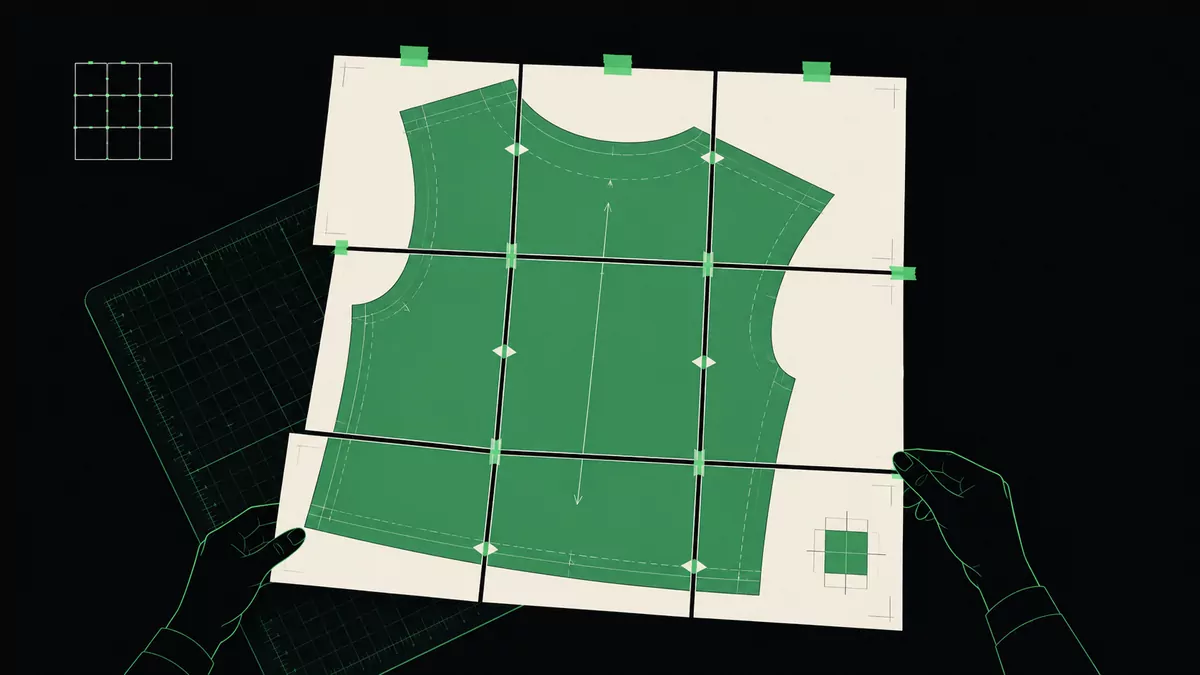
Step by step
- Get a pattern image. If your pattern is a PDF, export or screenshot a page that includes the test square, then open it in Maker Mosaic.
- Calibrate. Use the Measure tool to draw a line across one edge of the test square and enter its labelled size (e.g.
1 inor5 cm). - Choose your paper. Letter or A4, portrait. Maker Mosaic shows how many sheets the full pattern needs.
- Set an overlap so pages share a strip for alignment — useful when matching notches and seam lines.
- Add an alignment pattern (crosshair or grid) if you want extra guidance lining up the tiles.
- Export a multi-page PDF or ZIP and print at 100% / actual size.
- Verify before cutting: measure the printed test square. If it's right, assemble and cut.
Assembly tips
- Trim one overlap edge per seam, then match the registration marks.
- Tape on the back so you can still write on the front.
- Work on a large flat surface and butt pages edge-to-edge.
FAQ
Can I print an A0 pattern on Letter paper?
Yes — that's exactly what tiling does. The large pattern is split across many small sheets you assemble.
My test square prints slightly off. Why?
Almost always because "Fit to page" is on. Print at 100% / actual size and re-check.
Does it work for quilting and cosplay templates too?
Yes, any pattern or template with a known reference length.